


Wearable-tech
Design Process
1
To begin the design process for the wearable technology, we thought of the vital functions we wanted the technology to perform. When one considers the wearable technology available on the market, there are plenty of possible combinations of functions. In order to reduce cost, we decided to have as few functions as possible while still remaining effective. This resulted in a lack of screen, Bluetooth connectivity, vibration capabilities, and heart rate monitors that are standard in most comparable U.S. products. Cost also limited our options for the power source of this technology, with solar panels of the size we would need being too expensive per prototype to justify the renewable advantage. We instead opted to use a small battery, as we had the additional constraint of size.
2
Once we decided it would just be a simple reminder system using LEDs and a timer function, we then considered the amount of LEDs to use. We decided that using any more then two would be too complicated for the patient to keep track of, as well as an unnecessary tax on our power source.
3
We then considered the electronic components necessary in order to create our circuit. Using those assumptions, we created our initial schematics for the circuit, as seen below.
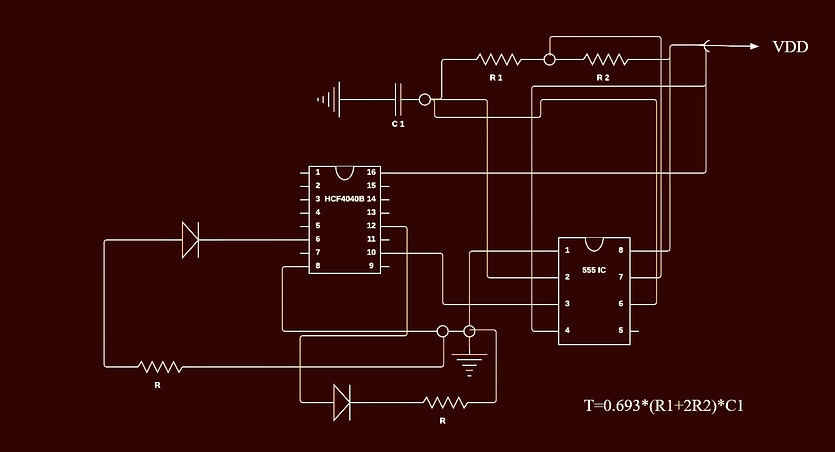.png)
4
After ordering our necessary components, we began building the circuits. At first we prototyped on the breadboard to test the our electronics and circuit:
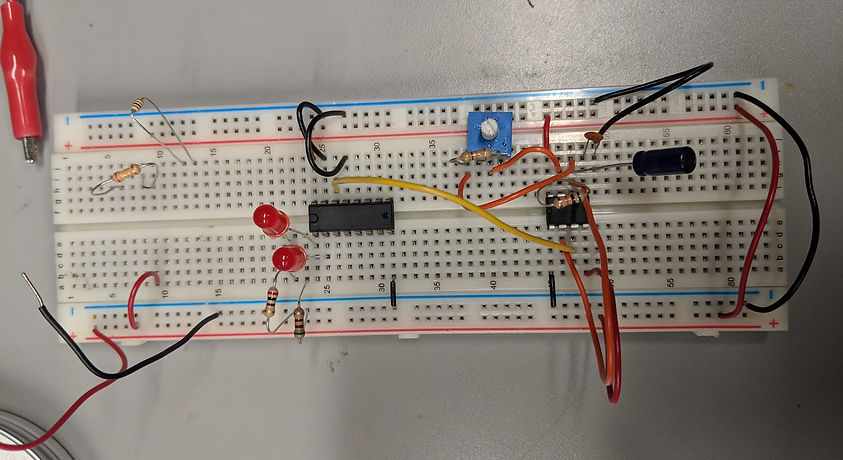.jpg)
5
After successfully getting the electronics to work on the breadboard, we then miniaturized the components in order to adhere to the size constraints that come with the electronics being housed on a bracelet. We first tried to to weld the electronics on the prototyping board without the counter:
.jpg)
6
Then, we added the counter to the prototyping board:
.jpg)
7
Another major step in designing the wearable tech was to create the wristband. Our first consideration was the material. As it made up the bulk of the design, this was where the constraint of low-cost came into play. We wanted the band to be plastic in order to be both durable and wearable, but we wanted the specific plastic to be biodegradable and easily reproducible locally. We initially experimented with creating our own bioplastic out of vinegar and glycerin, but quickly realized that highly-specified equipment would be needed in order to create a consistent product. We then researched some commercially available plastics and found that polylactic acid, or PLA, was the best fit. Used in 3D printing, this biodegradable plastic was tough enough to withstand everyday wear-and-tear and easy to print into the designs we wanted.
8
After deciding on the plastic, we considered the actual design of the band. We wanted it to be strong enough to not break as well as flexible enough to fit different sized wrists. We initially thought about using a living hinge in the design, as shown below:
.jpg)
9
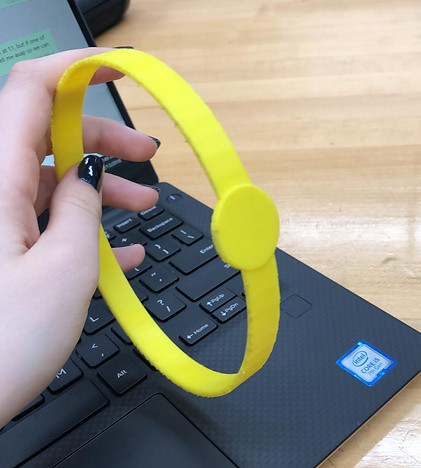
However, the band was flexible enough without the additional cuts, leading us to this design. This interaction has a stage included in order to mount the electronics onto the wristband.

10
We sent this design to the Makerspace in order to get in printed. After a few issues with previous prints, we finally got this band:
11
After mounting the electronics to the band using hot glue (which was not a design choice, more a desperation to finish the prototype choice, our final prototype looked like this:
